Exploring NAT Traversal and Tunnels with Inlets and Inlets Pro
Inlets! What is it?
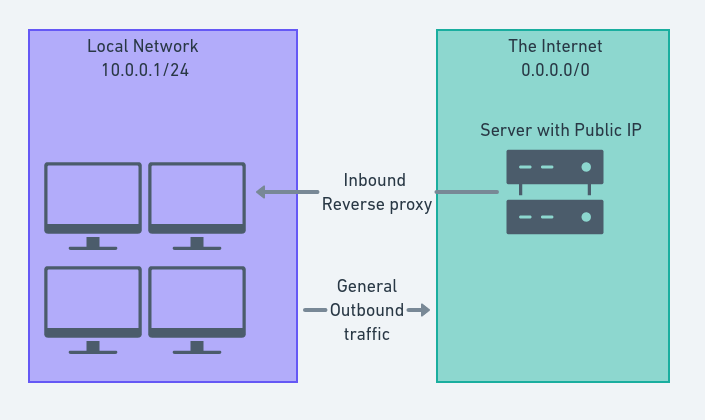
inlets is a reverse proxy and service tunnel written in Go.
This is the section from the inlet’s github README
inlets PRO replaces SSH tunnels, VPNs, SaaS tunnels, port-forwarding and dedicated connections.
It’s compatible with any HTTP (L7) or TCP (L4) software and can work through the most challenging network conditions like captive portals, HTTP proxies, firewalls and NAT to give you access to services.
You can run the tunnel as a process, container or Kubernetes Pod, and it’s easy to configure or automate it.
This means you can use it to create inbound network tunnels to computers that don’t have a public IP, are behind firewalls or get assigned new IPs frequently. Things like your laptop when you move from the office to a coffee shop. While writing this post I have probably been on 5 different networks, but still been able to connect to my laptop’s k3d cluster using the same public IP address.
Why inlets
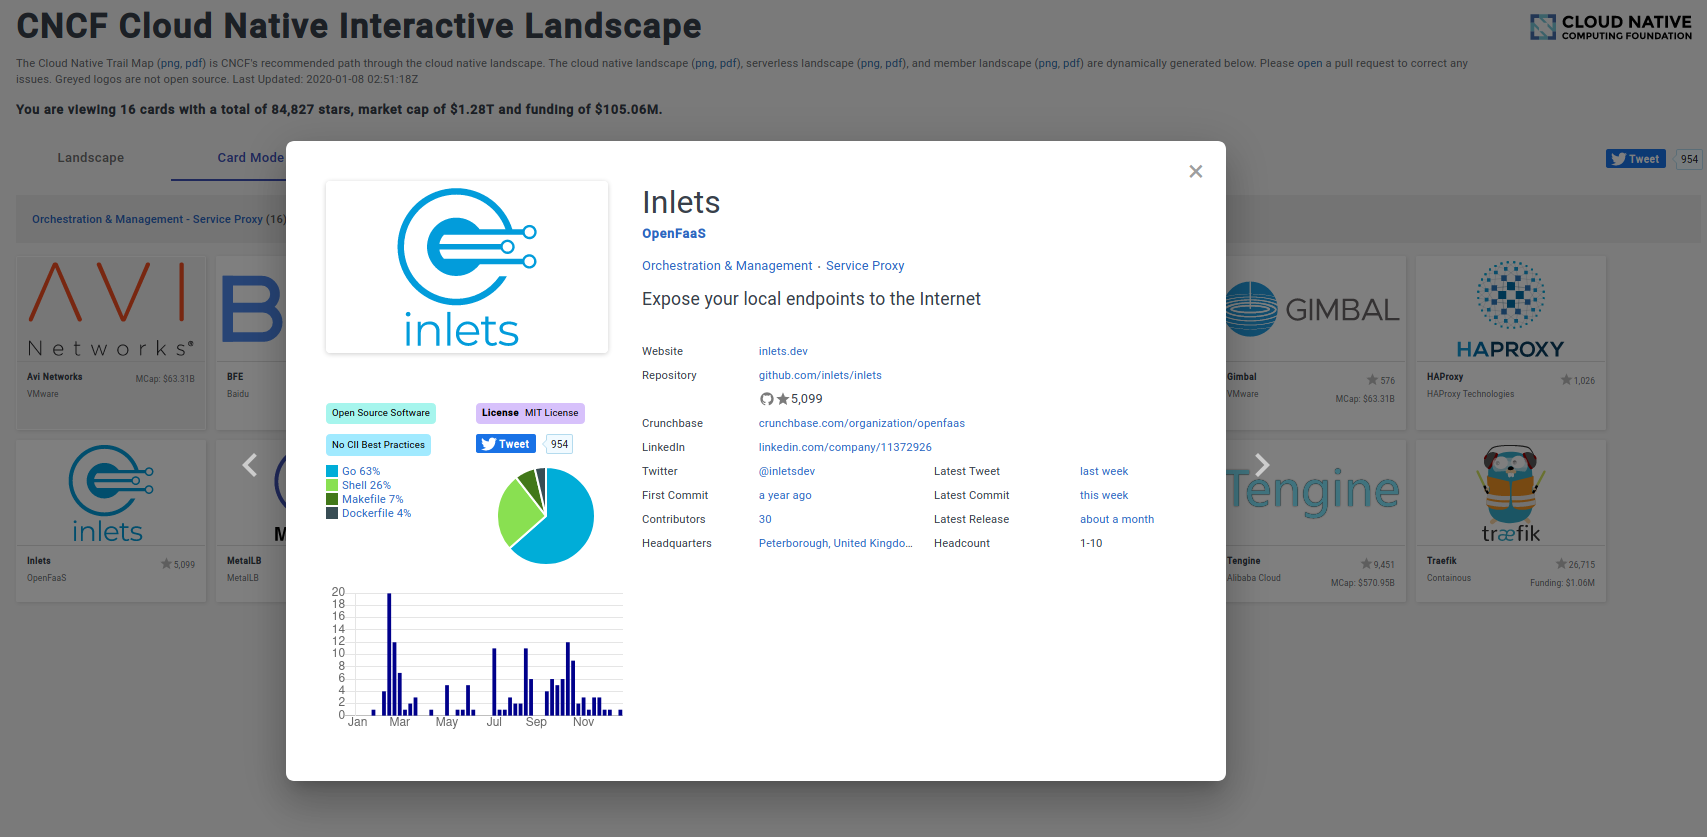
It’s on the landscape in the section. It’s cloud native! inlets has a place on the Cloud Native Computing Foundation (CNCF)’s technology landscape. It’s in the Service Proxy category along with MetalLB, Traefik, HAProxy and Nginx.
There are plenty of freemium services out there that will give you inbound network access to processes that don’t have inbound connectivity, but most of these services are in control of your data, rate limit and are closed source. Inlets gives you back control of your data, privacy and lets you run the service in the way you want.
We have already mentioned a few services like Ngrok and Argo Tunnel, but they are closed source and have severe service restrictions, plus you are not fully in control of the service.
With cloud VMs starting at $5 with heaps of inbound data transfer there’s no need to pay 10s of dollars a month for someone else to run a limited service for you.
How it works
Inlets creates a tunnel from your local computer to a public cloud instance (or anything that can accept inbound traffic). I have been using digital ocean’s smallest VMs as my exit nodes. However, you can set up inlets using anything that can be accessed from both the internet, and the application or process you want to expose.
inletsctl
There is a handy CLI for managing your inlets services called inletsctl. I will be using this cli throughout the post as it simplifies the process of getting things set up and configured.
 _       _      _            _   _
(_)_ __ | | ___| |_ ___  ___| |_| |
| | '_ \| |/ _ \ __/ __|/ __| __| |
| | | | | |  __/ |_\__ \ (__| |_| |
|_|_| |_|_|\___|\__|___/\___|\__|_|


inletsctl automates the task of creating an exit-node on cloud infrastructure.
Once provisioned, you'll receive a command to connect with. You can use this
tool whether you want to use inlets or inlets-pro for L4 TCP.

See also: inlets-operator which does the same job, but for Kubernetes services.

Usage:
  inletsctl [flags]
  inletsctl [command]

Available Commands:
  create      Create an exit-server with inlets PRO preinstalled.
  delete      Delete an exit node
  download    Downloads the inlets PRO binary
  help        Help about any command
  kfwd        Forward a Kubernetes service to the local machine
  update      Print update instructions
  version     Display the clients version information.

Flags:
  -h, --help   help for inletsctl

Use "inletsctl [command] --help" for more information about a command.
The create command automates the provisioning, setup and configuration of the publicly accessible exit-node using cloud instances.
Currently supported providers:
- Digital Ocean
- Equinix metal
- AWS EC2
- Scaleway
- Civo
- Google Cloud
- Linode
- Hertzner
You will need your own account and will incur costs with whichever provider you use if you are following along.
There are some great blog posts already about setting up inlets without the CLI
- HTTPS for your local endpoints with inlets and Caddy - Alex Ellis
- Setting up an EC2 Instance as an Inlets Exit Node - Matt Bacchi
Therefore I won’t be focusing on this, instead we will focus on the why and the what of inlets.
Before you get started
It’s probably best to say that if you are using a corporate network, or any network you aren’t responsible for, you should ensure you have permission to start routing inbound internet traffic. It goes without saying that this exposes the network to extra risk and could drastically increase the network attack surface.
inlets-operator
I’m using Kubernetes and can’t forward every deployment, that would take ages…
Not to worry, the inlets-operator has your back.
The operator automates the creation of an inlets exit-node on public cloud, and runs the client as a Pod inside your cluster. Your Kubernetes Service will be updated with the public IP of the exit-node and you can start receiving incoming traffic immediately.
I have been writing a separate post on the inlets operator. It has a much more specific usecase if using Kubernetes somewhere that you don’t have inbound network traffic. Like k3s/k3d/minikube/microk8s/Docker Desktop/KinD.
It’s worth exploring if you need to expose your local kubernetes services, for example to give a demo or to collaborate.
People LOVE reverse proxies
My most viewed tweet so far is this

I’m not sure I fully get why people seem to love tunneling network traffic into networks where it’s either specifically disallowed (Corporate networks).
Why Inlets Pro?
According to the github REAMDE inlets-pro is an L4 TCP load-balancer.
OK, thanks.
For those of us that can’t remember the entire network stack and what each layer does or is (humans?),
this roughly translates as deliveres the correct data to the correct application process over the network.
So putting that in the context of inlets-pro, it forwards TCP traffic over an encrypted websocket secured with TLS to your application process. Cool!
These are some of the features
- Support for any TCP protocol
- Automatic TLS encryption for tunnel and control-port
- Pass-through L4 proxy
- Automatic port detection, as announced by client
- systemd support and automatic retries
- Kubernetes compatible
Enough talk - time for action
Setup
Inlets
We have already briefly looked at inletsctl, but we didn’t discuss installation or setup.
All of the commands shown are for linux and will probably work on Mac too. If you are using Windows then you should probably use WSL.
Download and install inlets, inlets pro and inletsctl
# Install Inletsctl to /usr/local/bin
curl -sLSf https://inletsctl.inlets.dev | sudo sh

# Install Inlets Pro
sudo inletsctl download
Get your Inlets license by buying a subscription here
I’m using Digital Ocean for my exit nodes, you need to grab your Digital Ocean API Key if you are following along.
I have saved mine in a file called do-token in my home directory.
If you want to use one of the other providers you can check the examples in the inletsctl github repo.
Then we can create an exit node
inletsctl create --access-token-file ~/do-token
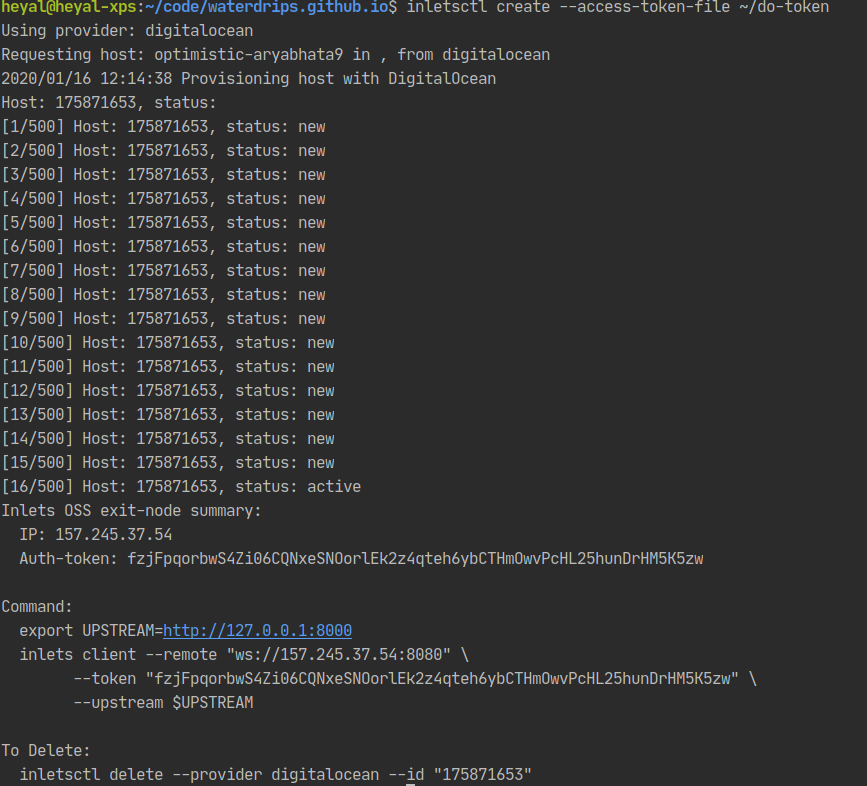
You should have some similar output to above, this is showing that we created a node and it’s ready to be configured to forward traffic. It’s even helpfully given us the commands we need to run to get something configured.
If you have docker installed you can do a quick test to see if it’s working.
docker run --name nginx-test -d -p 8080:80 --rm nginx:latest

export LICENSE="your inlets pro license"

export UPSTREAM=http://127.0.0.1:8080
inlets-pro tcp client --remote "ws://157.245.37.54:8080" \
      --token "fzjFpqorbwS4Zi06CQNxeSNOorlEk2z4qteh6ybCTHmOwvPcHL25hunDrHM5K5zw" \
      --upstream $UPSTREAM \
      --license $LICENSE
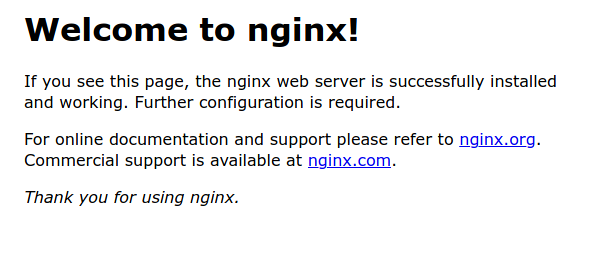
You should have some output in your terminal that shows inlets client connecting to your exit server. You can now navigate to the public IP of your exit node. If you see the nginx splash page then we are all set up!
If that worked you can stop the docker container
docker stop nginx-test
Now we have validated our setup we can get into some real use cases!
Broadly my use cases are split into HTTP traffic, and non HTTP traffic. The example commands to forward these two categories of traffic are the same, so I will show some example uses and then the commands needed to get inlets or inlets-pro working.
HTTP based services
Webhooks
While developing OpenFaaS Cloud we reled on webhooks to let us know when new code has been pushed, and therefore when to run new builds.
This is easy with inlets, we just forward the webhooks through an inlets exit-node to our local machine, this means we can build our services locally without having to push containers up to registries and pull them back down in a remote kubernetes cluster. This saves us loads of time and bandwidth.
Exposing temporary services
Let’s suppose you are working remotely on a set of microservices, your colleague wants to test their new front-end against your backend service, this means committing, raising a PR and getting code into a development or staging environment to properly test. Alternatively they could pull your code, build and deploy that service themselves.
Problem is, both of these are a hassle. We like things to be easy! You get some free user testing, potentially catch a bug before your code even makes it into PR, your colleague gets a service provided by the person building it, without having to do anything. Sounds good.
All you need to do is expose your service using inlets. The commands to do this are later in the section.
Demos
It’s always cool to give access to the demo services and websites you are making to the “users”, this could be the product owner, client or your business partner.
Without using something like inlets available you would need to deploy your application up to a machine that had a public IP, configure the service and then remember to keep that up-to-date. You would also need to go off to that machine to get logs. Having this instance running costs you money and takes away valuable time during the early product development stages.
Using inlets we can expose a local service to the internet in less than a minute, and when we are done we can tear everything down again, meaning we can create on-demand tunnels, only pay for what we use and spend more time where it matters, creating value for our customers.
I can deploy a local copy of my blog using docker-compose, that updates when files change and allows me to see what my changes will look like without publishing to the rest of the world.
The commands
Let’s look at the last example above, my personal blog in development mode.
I can expose my service to http://127.0.0.1:4000 by running docker-compose up. This stands up a container that
publishes to port 4000 on my local machine.
Using the exit-node we created earlier we can set up an inbound network route to my blog like this
export UPSTREAM=http://127.0.0.1:4000

inlets client --remote "ws://157.245.37.54:8080" \
      --token "fzjFpqorbwS4Zi06CQNxeSNOorlEk2z4qteh6ybCTHmOwvPcHL25hunDrHM5K5zw" \
      --upstream $UPSTREAM \
      --lisence $LISENCE
My local service will be accessible at the remote ip. That’s it, all that’s needed.
You can substitute the port on the UPSTREAM environment variable if your service is using a different port,
5000 for example:
export UPSTREAM=http://127.0.0.1:5000
Then we just run the inlets command again.
Non-HTTP based services (inlets pro)
Home Lab
I didn’t know if I should have put Home Lab under HTTP services, but I decided it probably lives under the inlets-pro section, I personally use mainly HTTP, but do have an SSH Tunnel open from time-to-time to allow configuration of the resources from outside my home network.
You might be collaborating with someone who doesn’t have their own resources, or computer with particular chipset. So it’s useful to be able to open these up to trusted parties via the internet.
Here’s an example from the inlets author

IoT
You could open a reverse tunnel to configure, update and change the software running on IoT Devices no-matter where they are, provided they have outbound network connectivity.
This could be a really good way to deliver updates to IoT devices.
Bastion hosts
Sometimes you need to get access to resources in private networks. This could be a database cluster or your kubernetes nodes for example. A common pattern is to have “SSH Bastions”. These are machines that live within the network but have an inbound network route. This allows you to ssh onto these machines and then jump into internal parts of your network.
Usually access to these machines is usually controlled by IP Whitelisting, using SSH Keys and .
We could add an extra layer of security into the mix here by not having any inbound network access to the machine. This limits the discoverability of the service. If you have ever run SSH on a public IP you will be inundated by bots trying weak username/password combinations.
This would look like this:
An example, SSH
So to set up TCP forwarding we can use inlets-pro and inletsctl. I will be running through a simple SSH example,
but this could be applied to any of the non-HTTP examples in the same way.
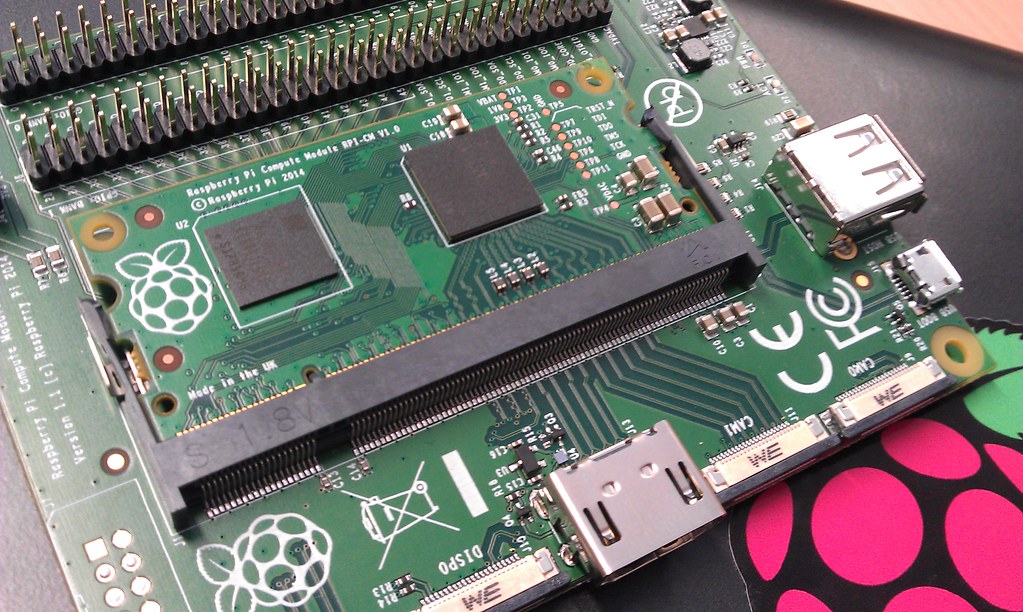
I’m going to run the client on one of my Raspberry Pi computers with ssh enabled using key pairs only (here is a Digital Ocean post on setting this up)
Once we are logged into our Pi on our local network we can set up the inlets-pro client to enable ssh access from the IP of our exit node. We also need to change the default SSH port away from 22, as our exit-node will have ssh mapped to this port and we won’t be able to use it.
Here is an article about changing the default ssh port I used 2222, and will refer to that from now on.
# Set this to the IP of the machine you want to expose on the web
export RPI_IP=192.168.0.99

inletsctl create --access-token-file ~/do-token --remote-tcp $RPI_IP
This gives you a command that looks like this to run on our client to forward the traffic
export PORTS="2222"
export LICENSE="YOUR INLETS_PRO_LISENCE"
inlets-pro tcp client --connect "wss://178.62.88.252:8123/connect" \
    --token "a-long-random-string" \
    --license "$LICENSE" \
    --ports $PORTS
We need to forward port 2222, so set this in the TCP_PORTS variable. Don’t forget to set your inlets-pro licence key
too.
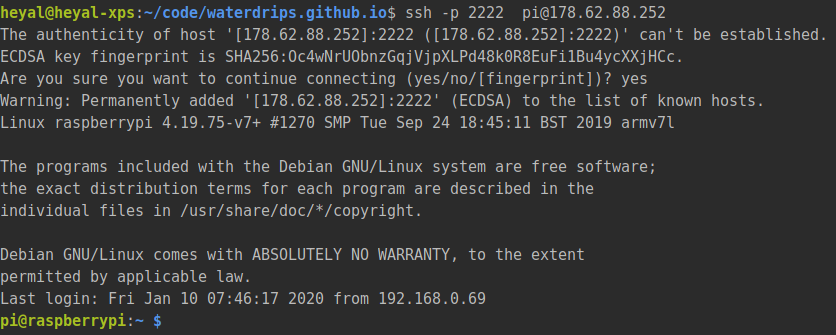
The last step is starting the client on our Raspberry pi. SSH on there from your computer and run the command!
If we have set up SSH correctly, and everything works as expected we should be able to ssh onto our Pi using the public IP
ssh -p 2222 pi@178.62.88.252
This example should work for any service that uses TCP. You will just need to edit the PORTS environment variable
and re-run the client command to forward different ports.
Have a go yourself
Check out each of the tools we have looked at on github
- inlets-pro - the TCP tunnel
- inletsctl - The cli tool we use to speed up provisioning servers
I’m sure there are loads of other things we could do with this. I would love to hear from you if you have any more great use cases. You can tweet me @alistair_hey or use linkedin, github or email (links should be at the bottom of the page)